Arri Hi 5

ARRI Unveils New Hi-5 Device for Wireless Camera and Lens Control

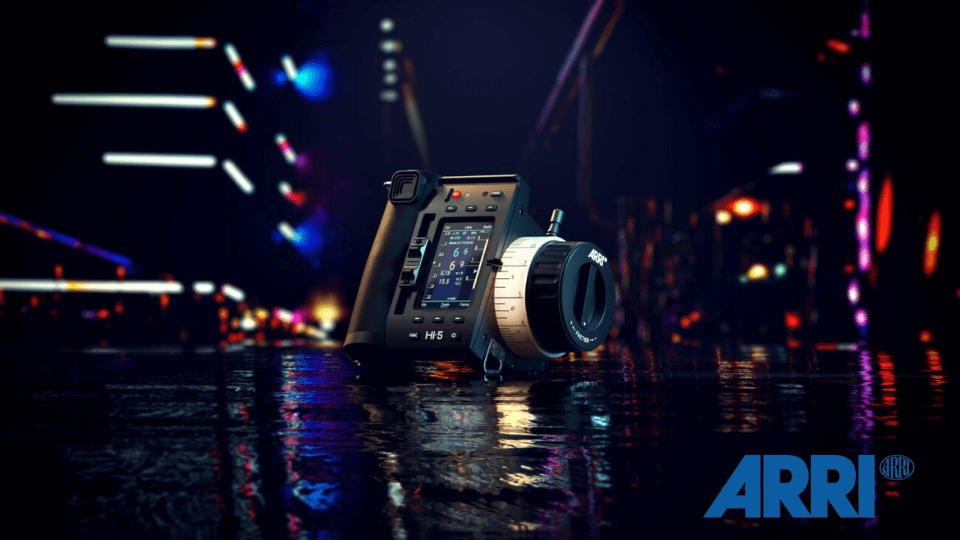
After a considerable development period, ARRI has introduced the Hi-5, a hand unit that provides wireless camera and lens control for challenging production scenarios. The Hi-5 is an update to the WCU-4 that was introduced way back in 2012; and nearly a decade later, a lot has changed in the world of digital filmmaking.

How ARRI arrived at the name is a touch muddy: the 5th-generation hand unit, the 5-IH—didn’t quite roll off the tongue, so it was flipped to the Hi-5. It doesn’t make perfect sense, but it’s much easier to verbalize; which, when you’re running-and-gunning under a tight schedule and demanding shotlist, is really all you can ask for.

The Hi-5 follows the roadmap established by the WCU-4 by adhering to a similar ergonomic system. In fact, the two devices look strikingly familiar, even though their designs are separated by nearly a decade of moving image innovation. 

But this isn’t the newest iPhone; aesthetics aren’t necessarily the point of this release. The Hi-5 prides itself on its attention to detail, touting its painstaking innovations that advance nearly every area possible for a hand unit that wirelessly controls lenses on-set. Truly, ARRI has pulled out all the stops to make this an AC’s favorite.

For starters, the Hi-5 is completely weather sealed, so your device is safe from water, dirt, glitter, haze—practically anything that can show up on a film set. Similarly, there’s an easily-replaceable PanzerGlassTM screen protector to keep your screen safe and as readable as possible over time, without the need to replace the device itself. The display itself is customizable, so you can have a clean HUD while cherry-picking the camera information you’d like to see while you shoot.


In fact, it seems that ARRI was laser-focused on user personalization when designing this build, as most of its features encourage the user’s customization. And this tenet goes far beyond the ergonomics and extends into the electronics.

For example, there are three user buttons on the side of the device that can be personalized in the menus. Similarly, there’s a focus knob adjustable to the operator’s preferences. ARRI employs a system of small Pogo pins on the Hi-5 that automatically recognize any marked focus rings that are attached to the camera. It’s not the showiest feature, but the plug-and-play focus rings system allows you to quickly adjust your focus preferences for different lenses and shot lengths, not to mention versatile focus-pulling when camera distance changes.

Lens data is saved by the Hi-5 device and is even accessible via the ECS Sync app for Apple iOS, and ARRI claims on Android devices in the future. There is a Bluetooth dongle that users can remove and insert into their Hi-5 that gives the unit the ability to transmit lens data to the ECS Sync app, as well as view archived lens files for easy reference throughout a shoot (or perhaps even months later, in the edit). 

Clearly, this isn’t a device you can just lend to a friend without any learning curve attached; the Hi-5 is ostensibly intended to be an AC’s best friend—a long-term purchase that you can grow familiar with over the course of a shoot (or maybe keep forever).

Even its wireless radio capabilities are personalized, in the sense that the Hi-5’s radio modules are swappable, and can be removed or reintroduced depending on your frequency needs, the region you’re shooting in, or the physical limitations of your rig. There’s the RF-MIP (2400MHz DSSS), which comes with the Hi-5; then the RF-2400 (2400MHz FHSS) and the RF-900 (900 MHz FHSS), with latter two becoming available for purchase in late 2021. With use of the Radio Interface Adapter, users can operate the Hi-5 with non-ARRI camera models.

The Hi-5 is developed for ARRI cinema cameras, like the ALEXA and ALEXA Mini—but the hand unit comes with the ability for expansion through optional licenses. With your own personal configuration, you can rig your Hi-5 for full functionality with RED, Panavision, and Sony cameras (among others). It’s worth doing your research beforehand for your particular setup, so you can have a good sense for the extra work required to suit your rig. Other optional licenses for the Hi-5 include the Focusbug menu for enhanced, ultra-personalized focus-pulling; as well as the Cinefade license for Cinefade’s VariND depth of field stylization.

With their keen designers and developers, ARRI has put together a new device built for durability and convenience. If all goes well, it might be another decade until its next hand unit.
 

Posted in Uncategorized
BLACKWING7 Custom-Tuned Large Format Lenses

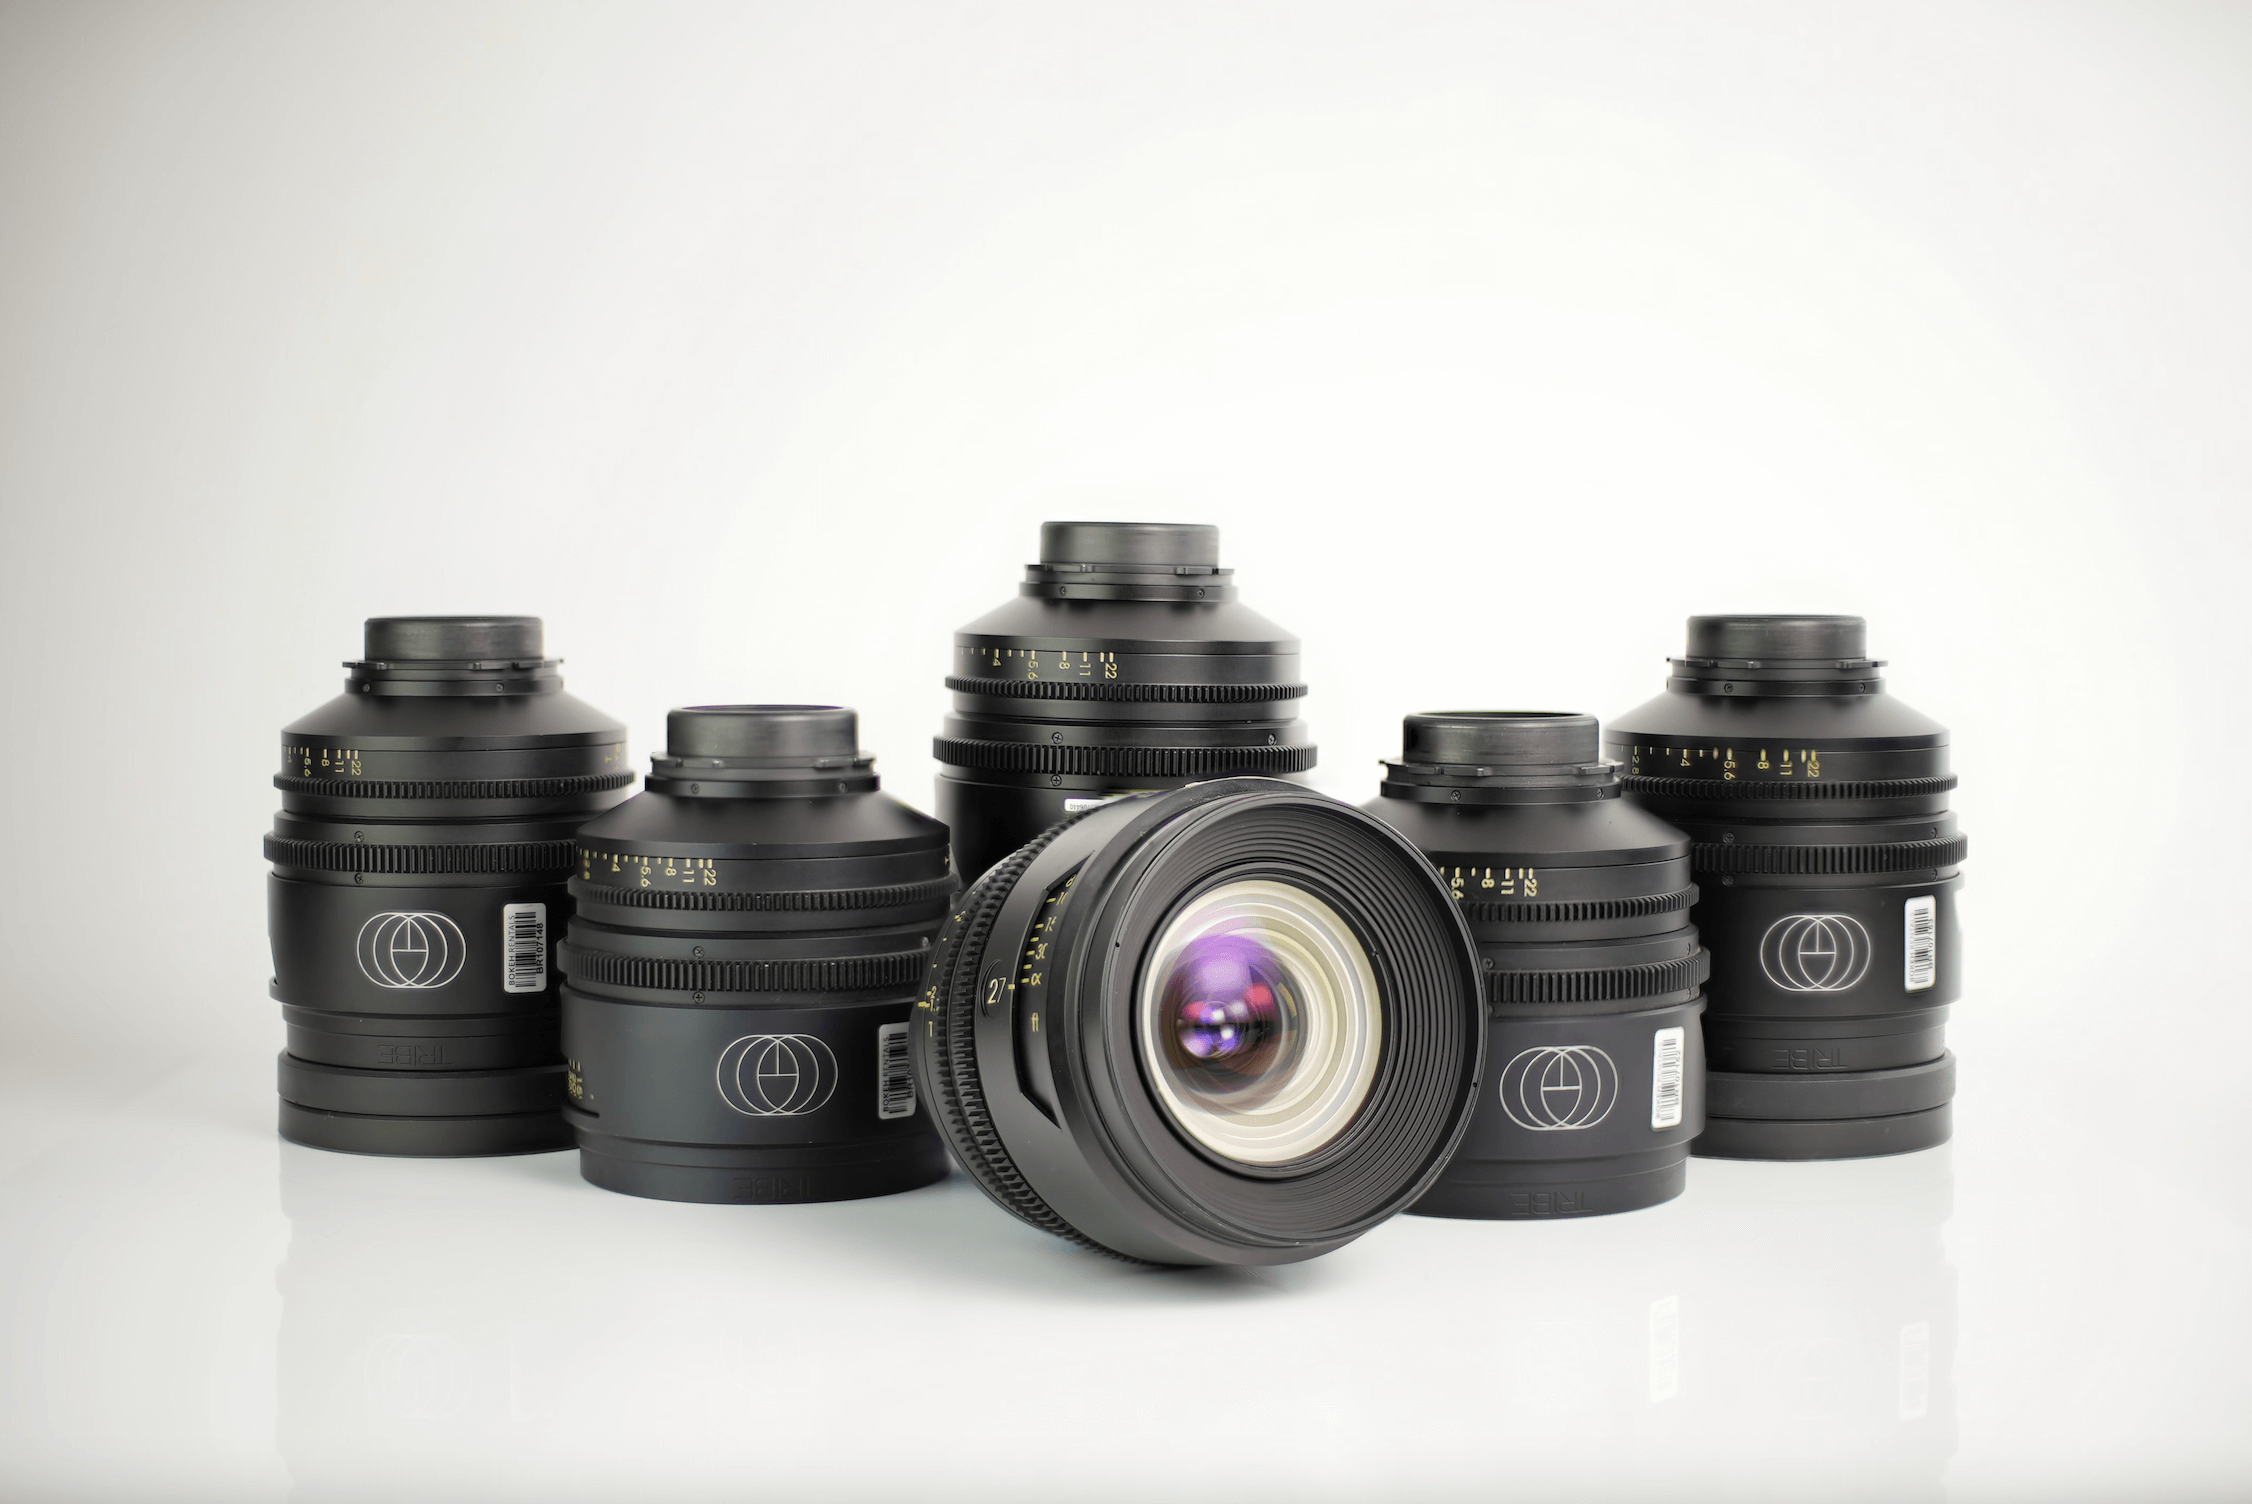
BLACKWING7 Custom-Tuned Large Format Lenses

Oscar-Nominated cinematographer Bradford Young (Arrival, Solo: A Star Wars Story) has teamed with Neil Fantom, former ARRI Executive, to introduce BLACKWING7, a line of customizable large format cine-prime lenses. The BLACKWING7 collection’s showiest selling point, besides its stunning demo footage (shown below), is the lens’ tuning options provided at point of manufacture.

Although the BLACKWING7 look has been inspired by optics from the 1930s-1960s, the manufacturer’s official site states that “the real inspiration… lies in the evolutionary nature of experimental music and audio synthesis, and the process of creating distortion though sound amplification”. And interestingly enough, the comparison sticks: as BLACKWING7 explains, its tuning capabilities are akin to EQ adjustment in music production.

BLACKWING7 lenses are built to the PL-mount standard, allowing cinematographers to apply their customized lenses to any cinema camera. Common bodies for high-end, cinema-ready images with BLACKWING7 include the Sony Venice, ALEXA Mini, or the large format ARRI ALEXA 65. In the spirit of customizability, however, there are additional mounting options upon request.

The BLACKWING7 options are all crafted by hand to suit the owner, and have tunable “sharpness, contrast, roll-off, spherical aberration, field curvature, edge halation and flare to suit the personality and intent of the owner”. These options are all intended to give cinematographers control over the degree not just of film emulation attributes, such as edge halation or flare, but to the overall distress that can be placed to the image—all in the spirit of moving beyond the overly clean, clinical digital look that affects 21st century storytelling, especially on the small screen.

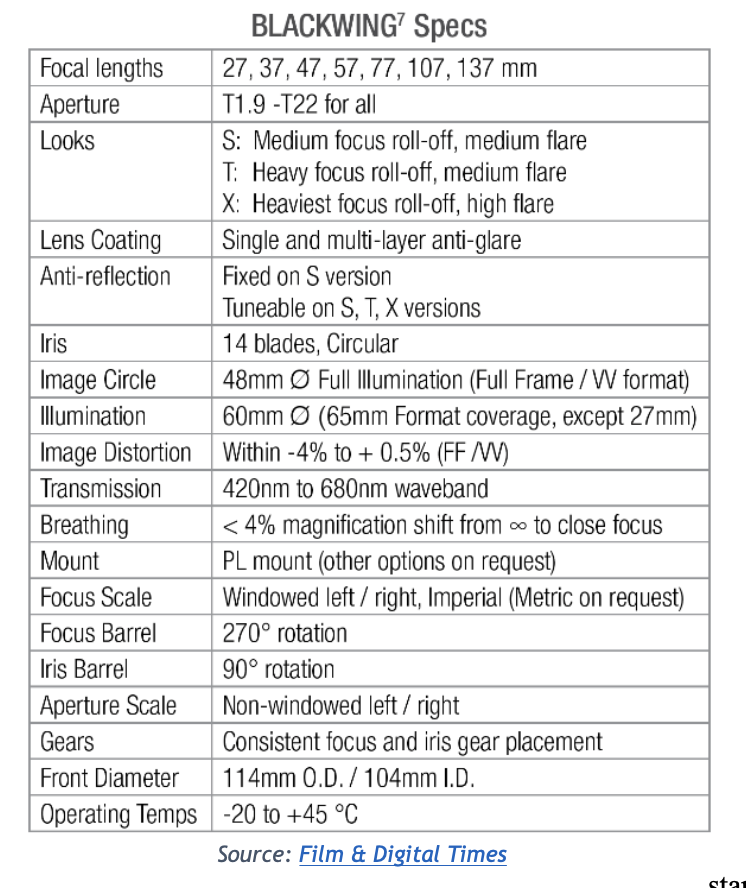
Blackwing Tribe 7 Specs

What this means, essentially, is that users begin the highly personalized purchase process by selecting their desired modifications for their BLACKWING7 lenses. Or, if they’ prefer less personalized glass, they can elect for one of the three pre-set tunings.

The three pre-set editions of BLACKWING7 are Straight (S-Tuning), Transient (T-Tuning), Expressive (X-Tuning), each with their own visual characteristics.

Straight:
Smooth roll-off with single layer coating. Inspired more by lenses from the early to mid-1900s, this option prioritizes sharpness and minimizes distress to the image.

Transient:
Softer, Heavy focus roll-off, medium flare and light reactivity. The T-tuning serves as an aesthetic in-between to the BLACKWING7 series.

X-Tuning:
Heaviest focus roll-off, high flare and light reactivity. X-tuning exaggerates edge detail halation, another throwback to digital’s photochemical predecessors.

A cursory scroll through TRIBE7’s Instagram would communicate the brand’s deep affinity for visual artists of present and past, influences which no doubt play into the lenses’ unique looks, whether it’s on the S-tuned standard end of the spectrum, or the “extreme”, X-tuned profile.


Also featured prominently on social media is the BLACKWING7 Binary, an aluminum-finished lens built and distributed to filmmakers to promote the new brand. The Binaries have a minimum T-stop of T1.8, just a hair faster than the actual line’s across-the-board rating of T1.9. Otherwise, the Binaries are relatively demonstrative of the BLACKWING7 line, with the middle-of-the-spectrum T-tuned characteristics and an overall similar image. Although the aluminum housing sets the Binary apart from the other BLACKWING7 options, the image itself is easily comparable.

pastedGraphic.png

“It all began when I was researching cameras and lenses for Solo: A Star Wars Story. Neil came to me with a wonderful opportunity to experiment. They were developing the DNA lenses at ARRI Rental and that gave me an opportunity to embed some of my own meta, my history and some of my own life into the glass. Things progressed from there and now we are introducing BLACKWING7.” — Bradford Young, ASC

pastedGraphic.png

Although roll-out and implementation of the BLACKWING7 lenses has been subtly stalled by the across-industry COVID-19 halt in physical production, there’s no doubt that the formalistic latitude provided by the lenses’ customizations will be employed among all digital mediums, even those without moving images.

Because of tunability offered by BLACKWING7 lenses, all products must be ordered by appointment through the official website, email (seven@7isatribe.com), or Instagram account. This is all in the brand’s modus operandi of personalization, and crafting looks based on dialogue. Clearly, BLACKWING7 isn’t interesting in mass-producing a look.

From there, lenses are hand-built to buyer customizations, and shipped out personally. S-Tuned primes begin at $10,000; T-and-X-Tuned at about $11,000, and Binaries at $12,700, but these prices fluctuate with consumer customizations.

Learn more at www.blackwing7.com

Contact us to customize a package to suit your production needs at low prices.


Posted in Uncategorized
Zeiss_Supreme_Radiance

ZEISS SUPREME PRIME RADIANCE ADDS 4 NEW LENSES

ZEISS has made a name for itself among cinematic, large-format sensor lenses for its unrivaled technical consistency. Consistency is just a word, but on a professional set, where time-is-money on an eye-popping scale—consistency means tens of thousands saved between set-ups. 

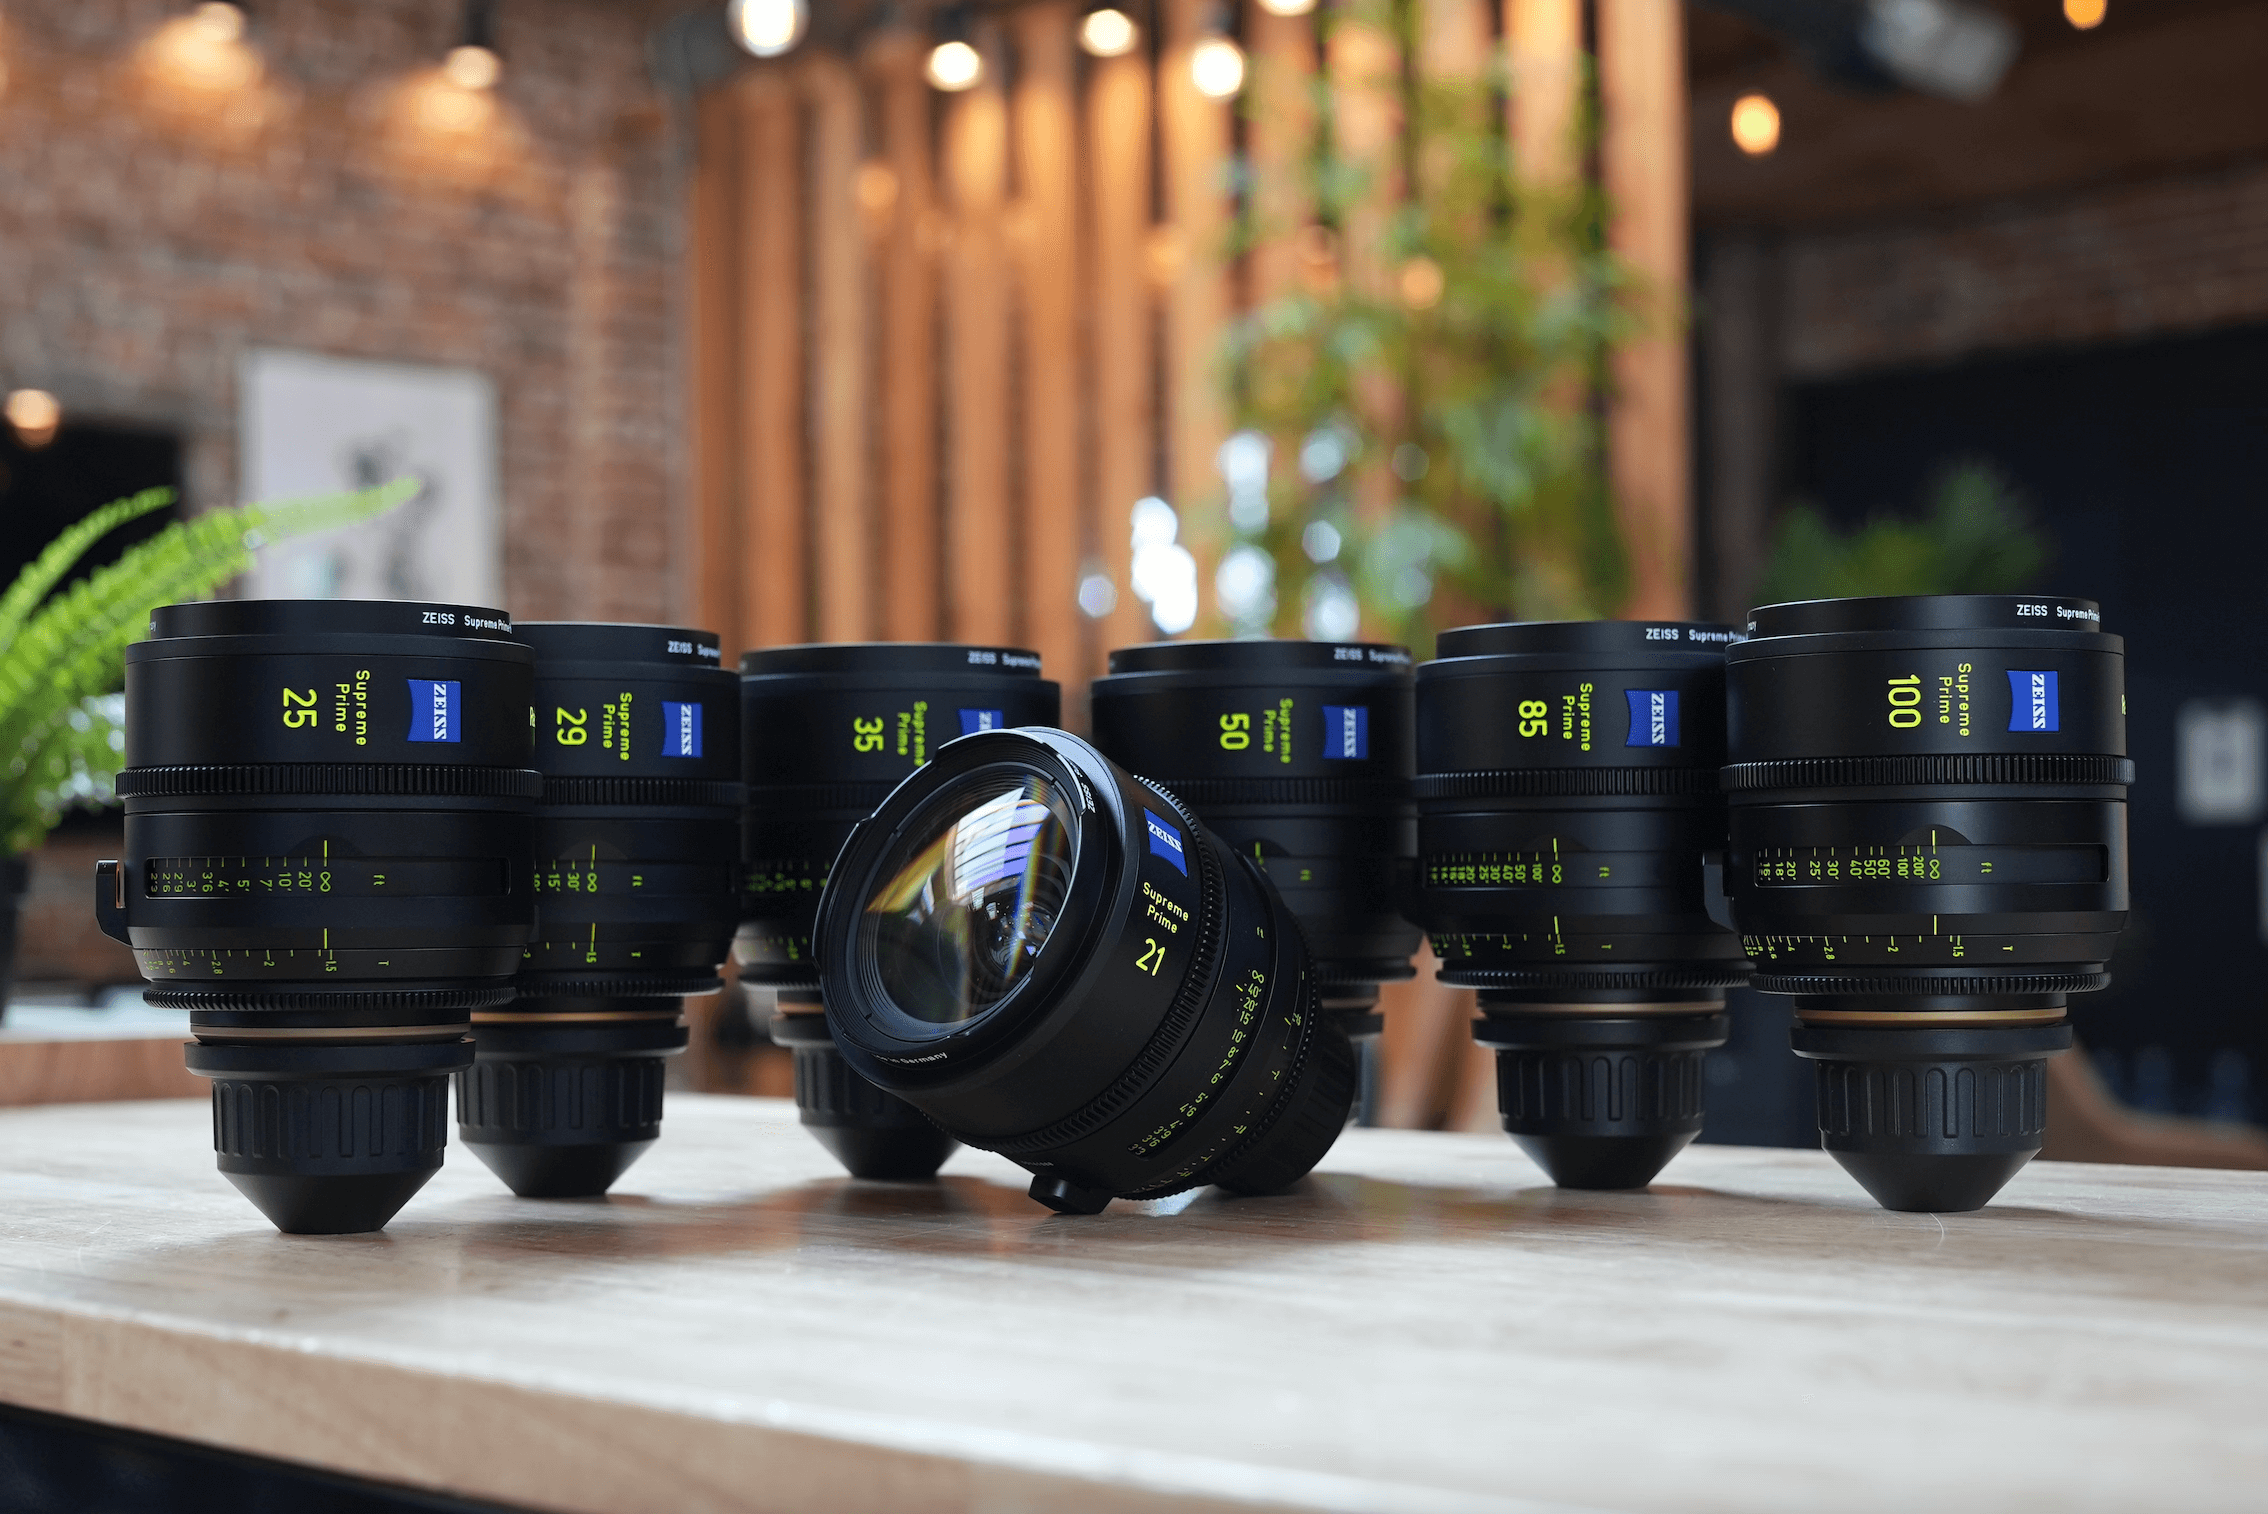
The Supreme Prime Radiance seven-lens set was initially offered by ZEISS in 2019 as a warmer, more versatile variation to its Supreme Prime line, which debuted in 2018. Not only does the Radiance glass offer a warmer look for skin-tones, but it has also been constructed with a particular focus to increase artistic control over flares. In its post-release consultation with filmmakers, ZEISS grasped that spontaneous flares can present an element of chaos on-set, whether it be a cost-consuming delay or a happy accident in the frame. And with that in mind, engineers set out to grant DPs greater latitude over a low-light, flare-stricken image.

To create the Supreme Prime Radiance lenses, ZEISS carefully reworked its T* coating formulae, resulting in a superior coating that maintains contrast and avoids the transmission loss that could occur when capturing flares. As a result of that innovation, the ZEISS Supreme Prime Radiance family gives cinematographers ultimate versatility and control, especially in low-light situations.

The Supreme Prime Radiance lenses were initially released in late 2019, and its vintage-adjacent look has found much acclaim among cinematographers in various mediums.

Steve Yedlin, A.S.C, is known for merging the digital and analog; working to find a naturalistic, even film-emulating aesthetic using digitally captured images. He’s written extensively about the existential challenge facing the film-look; and perhaps this passion for the authentic is why he’s employed ZEISS Supreme Prime Radiance Lenses on the sequel to 2019’s mystery-comedy, Knives Out, which you can see from the production’s viral press

photo. 

As far as its look, the Supreme Prime Radiance lens has a remarkably smooth transition between in-focus and out-of-focus planes, which provides depth and gentle sharpness to the frame. The Supreme Prime Radiance look renders a wholesome digital image without the unnerving exactness of some digital photography. Effectively, the Supreme Prime Radiance lens’ sharpness and soft fall-off is reminiscent of vintage lenses, and DPs have caught on quick. 

On the small screen, Emmy award-winning Dana Gonzales, A.S.C., found the ZEISS Supreme Prime Radiance family perfect for capturing the 1950s-period look of Season Four of FX’s Fargo. Even under the stress of a fast-paced television schedule, Gonzales was impressed by the lens’ focus and flare capabilities: “I use quite a bit of diffusion, but they are still very sharp with a soft fall-off, reminiscent of vintage lenses. I always embrace them and I love the organic way the Radiance captures them. The flares always feel right and not forced.”.

The Supreme Prime Radiance set was released in 2019 in seven focal lengths: 21mm, 25mm, 29mm, 35mm, 50mm, 85mm, and 100mm. But after its warm reception over the past two years, ZEISS extended the line to fill in the gaps and expand the outer bounds with

four new focal lengths: 18mm, 40mm, 65mm and 135mm. 

For cinematographers, new lens lengths presents more creative freedom under the Supreme Prime Radiance banner. Because every lens in the series can hit T1.5—switching between lenses quickly is a strong point. Even the new 135mm telephoto option can open to T1.5, defying the technological odds to maintain consistency among the Radiance family. Should a lens be swapped out to reframe or readjust, there’s no need to recalibrate exposure for any in-frame flares. Even when punching in from an 18mm wide to a 135mm closeup on Supreme Prime Radiance glass, the exposure remains consistent and the flares in control. 

The ZEISS Supreme Prime Radiance lenses, like its Supreme predecessor, incorporate an interchangeable mount system that allows efficiently shifting from a PL-mount to LPL-mount or EF-mount. For the short term, this capability allows quickly adjusting mounting systems on set without losing any VFX-crucial metadata. For the long-term, the accommodating mount system allows ZEISS lenses to remain functional inside the rapidly-evolving cinema camera market, where quickly-released products can go obsolete fast. Similarly, ZEISS Supreme Prime Radiance lenses are built for large-format sensors, so they can bring their elegant-bokeh, exceptional rich texture, and warm, low-light performance into future camera systems.

Although the 18mm, 40mm, 65mm and 135mm focal lengths will be available in Q3 2021, the Supreme Prime Radiance’s seven original sizes are available for rental at Bokeh Rentals.

Bokeh Rentals’ ZEISS Supreme Prime Radiance Set – $2,495/Day, $7,485/Week, $24,950/Month

Contact us to customize a package to suit your production needs at low prices.

Posted in Uncategorized

Bayer Sensor Technology

Bayer Sensor Technology

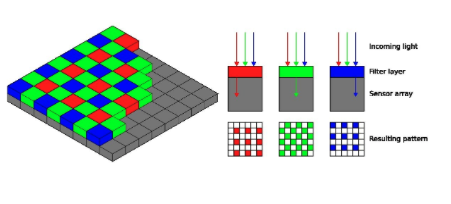
One of the greatest things that could happen to digital cinema is if color or wavelength of light could be recorded directly. Sensors would gain two to three stops of dynamic range, around 40% more detail, and much more accurate color rendition. Sadly, photo-sites are colorblind; they only record amount of light, not type of light. Therefore, camera systems have had to use some workarounds, each with their own complex engineering and flaws, to record color. Film stocks used layers of dyes, and early digital camera systems used prisms to separate wavelengths of light. Now, we are working in the era of the CFA, or color filter array. This is a filter applied over the top of the sensor with a specific pattern of red, green, and blue filters to separate light hitting each photosite.

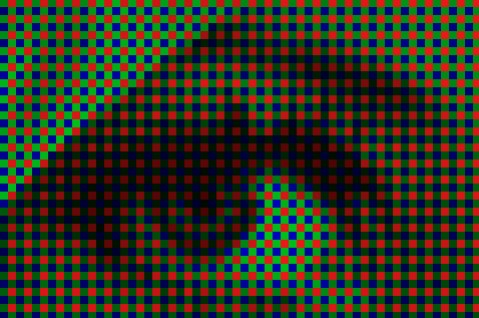
The Bayer filter array is the most commonly used CFA. The pattern is shown in the image below: each green photosite is surrounded by two red and two blue photosites in alternating red-green and green-blue rows. The sensor is divided into 50% green, 25% red, and 25%  blue photosites. Each photo-site is sensitive to only one color, and in the majority of camera systems, each photo-site corresponds to one pixel in the final image.

This confused me for a long time. How do we get the millions of colors we see in films? It seems that to get one accurate color pixel in the final image, you would need one green, one red, and one blue photosite on the sensor. It turns out that cameras are a lot smarter than that. Complex algorithms work to determine a pixel’s color based on the amplitudes of the pixels around it, and it does this millions of times for each frame. This process is called demosaicing, through which the color of each pixel is interpolated by those around it. This math accounts for a lot of the differences between different camera systems and the images they produce.

Part of the reason Bayer sensors work is because our eyes are much more sensitive to changes in brightness than to changes in color. Therefore, even though color detail is reduced by the CFA, it does not ruin the image’s apparent resolution. Look at the image above: what immediately catches your eye is the contrast between the near-white fire and the shadows in the forest and water: changes in exposure, not in color.

The reason there are twice as many green pixels as red and blue is because human eyes are most sensitive to green light, and thus exposure is primarily dependent on our perception of green wavelengths.

The downside to this way of determining color is it loses a lot of light. A lot. About 1/3…” of incoming light is rejected by the sensor’s CFA.

Another problem is the detail of the image is severely reduced by the filter array. Even if the demosaicing algorithm is extremely precise, there is still guessing involved, which will blur the final image and cause artifacts. This can be solved by shooting at a higher resolution than the deliverable format, and scaling down in post-production.

Digital Anamorphic – What is it?

ANAMORPHIC

The word anamorphic is derived from the latin anamorphosis, ana- meaning back, or again, and morphe meaning shape or form. Put together, it means transformation. Anamorphic refers to the class of imagery that requires the viewer to use certain tools or occupy a specific vantage point to view the undistorted image. This technique of imaging was invented by Renaissance painters. The above image is one example, a painting which requires a cylindrical mirror to be viewed. The bottom right image of Andrea Pozzoa’s 1694 painting in the church of Sant’Ignazio, Rome, is actually a flat ceiling, with a perspective that requires the viewer to stand in the center of the chapel to view the undistorted image.

Anamorphic lenses use these foundational principles of purposefully distorting an image for the image to then be returned to its undistorted state for viewing through a projector analogue or by pixel transformation digital. The original purpose of this was to capture a wider horizontal field of view than the width of the medium allows. The sketches below illustrate the ability of anamorphic imaging to capture a horizontal field of view wider than the image medium through initial squeezing of the image onto the medium which will then be de-squeezed later. The first image shows how a spherical lens would render the scene. The second image is what an anamorphic lens would render: a squeezed, distorted image. The final result is the de-squeezed anamorphic image: twice as wide as the original. This is an example of 2x anamorphic, meaning that the anamorphic lens squeezes the light by a factor of two. There are other squeeze factors, such as 1.5x and 1.33x, but 2x is the most common.

Anamorphic lenses were originally developed by Henri Jacques Chretien to give WWI military tanks a 180-degree field of view. Anamorphic did not attain popular use in film until the dominance of television started affecting theater ticket sales. Film studios had to capitalize on the strengths of the theater experience: color, and scale. Anamorphic lenses aided in the latter. In 1952, Twentieth Century Fox bought the rights to anamorphic imaging, with the goal being to create a spectacle out of going to the movies. Viewing films had to be monumental experiences, compared to the little 4:3 television in the living room. Anamorphic lenses allowed filmmakers to squeeze a wide, epic image onto the 35mm film stocks available and then de-squeeze it later in projection. This process is illustrated below. The bottom image is how the scene looks on the film stock: horizontally compressed, or squeezed. The top image is the final product.

Why not just film a 4:3 image with frame lines, then crop it to be widescreen later? A widescreen images width would cover the 35mm film stock, but not its height. Therefore a huge part of the film stock is wasted, AKA, loss of resolution and detail. Anamorphic lenses are used to gain back that vertical resolution, resulting in a significantly better image. The two images below show how anamorphic lenses utilize the entire surface area available; about twice the resolution is gained from the use of an anamorphic lens when used on a 35mm film stock, and about 40% on Super 35mm.

DIGITAL ANAMORPHIC

Digital sensors are by and large wider than 35mm film, which decreases the utilitarian need for anamorphic imaging. Spherical lenses used with these sensors can produce very wide images without the need for too much cropping. Using anamorphic lenses on digital sensors produces very high aspect ratios, and there is a loss of horizontal resolution compared to spherical lenses. The left image below is an example of a standard spherical lens used to cover the entire sensor. The right image is the same framing achieved with an anamorphic lens: the left and right sides of the sensor are not used, dramatically reducing the horizontal resolution of the image.

From a technical standpoint of using anamorphic only to preserve resolution, it only makes sense to shoot anamorphic on digital sensors when the required aspect ratio is extremely wide, such as 3:1 or 4:1, so the maximum sensor area is used in comparison to shooting spherical and cropping later.

The main reasons to shoot anamorphic on digital cameras are for artistic purposes. Anamorphic lenses have characteristic bokeh, flares, and heightened separation between the subject and background.

The oval-shaped element in anamorphic lenses which squeezes the light causes the out-of-focus parts of the image, or bokeh, to have an ovular shape. This much-loved component of anamorphic imagery gives the frame a sense of cinematic magic. Below is an image from Phoebe Waller-Bridge’s Fleabag, shot on Alexa Mini with Cooke anamorphic. Notice the ovular out-of-focus highlights in the background and the dramatic separation between foreground and background elements.

Anamorphic Lens for Rent

Alexa Mini LF & Signature Primes

ALEXA MINI LF & SIGNATURE PRIMES

In Spring of 2019, Arri announced their new camera which has changed the game in large format imaging. The Alexa Mini LF has the same size ALEV III sensor as the much larger Alexa LF (36 x 25mm, 4.4K) in a 5.7-pound compact body very similar in form to the revered Alexa Mini. Perfect both for controlled studio environments and rugged shooting, the Mini LF is just as versatile as the Alexa Mini. Arri’s gorgeous color science and remarkable dynamic range are now available in a large format accessible both to indie filmmakers and professional productions.

The current influx of large format cinema cameras has been followed by a plethora of lenses with image circles covering full frame. Arri’s own large-format signature primes are the perfect match for the Mini LF. Beautiful skin tone rendition, deep blacks, medium contrast and organic colors prepare the image for Arris famous color science in the Mini LF’s sensor. A fast aperture of T1.8, slight softening while maintaining resolution and smooth focus falloff make these lenses the ideal companion for cinematic full-frame shooting.

Read on to learn more about the Mini LF, from its sensor technology to recording formats, as well as its exceptional pairing with Arri’s signature primes.

ALEV III SENSOR

Arri has long been the captain of digital color science. It is widely agreed upon that film stock achieves the most beautiful colors possible in film; while contested, it is fair to say the Alexa line of cinema cameras is the closest digital has gotten to this ideal: rich, naturalistic color, pleasing noise, and great dynamic range. What goes on behind the scenes is a closely-held secret by Arri. Tests have shown that the Alexa cameras emulate the response of film to light, therefore achieving more pleasant and natural colors. It is common knowledge that Arri uses a dual-gain architecture, meaning that each photo-site outputs two 14-bit values covering different exposure ranges, thus increasing the camera’s overall dynamic range. The sensor photo-sites are also very large, increasing light sensitivity, decreasing the noise floor and increasing dynamic range. You can read more about the ALEV III sensor on Arri’s website.

HARDWARE

The Mini LF’s body has some major upgrades in comparison to the Alexa Mini. The slick new viewfinder, MVF-2, has eyepiece heating/defogging and real-time regulation of the image’s color accuracy. Stereo scratch mics are a huge help for syncing audio and music video work. The camera records to Codex Compact Drives, which supports its higher resolution recording.

RECORDING FORMATS

The Mini LF records a variety of Apple ProRes and ARRIRAW flavors. It’s notable that the 16:9 recording mode has an image circle of 36.35mm, which allows for the use of some Super 35mm lenses. Check out this chart from Arri as you plan your next shoot.

Arri Alexa mini LF

SIGNATURE PRIMES: THE LOOK

Creamy, smooth mid-tones and shadows with deep blacks. Naturalistic focus drop-off. Organic color and skin tone rendition. Check out the Signature Primes reel here.

These lenses are truly modern, with gorgeous rendering of fine detail, no breathing, and a rear magnetic filter and net holder which allows for the look to be manipulated. These are a perfect choice for when you need clarity and detail but don’t want to get too clinical. The lenses have character, but nothing that will distract or cause the images to be inflexible down the line.

THE LPL SYSTEM

Both the Signature Primes and the Mini LF feature Arri’s new LPL (large positive locking) lens mount, which has a wide diameter and shorter flange depth than the standard PL mount. This allows for large format lenses to be more compact while featuring low T-stops and great bokeh. The Signature Primes feature Arri’s updated data transmission system, LDS-2, which allows for much higher data rates than the previous generation and is made exclusively for LPL. Learn more about the new LPL mount on Arri’s website.

We have both the Mini LF and the Signature Primes available at Bokeh, and are working on a test with this combination right now. Check back on our website in the coming weeks for an in-depth look at what makes this a great combination.

Lighting 101

The modern cinematographer lives in an incredible time of technical advancement. There are so many different ways to shoot a scene, the freedom can be daunting. What camera, with which lens, will impart this specific feeling upon the viewer? What quality of light will support the idea I’m trying to communicate in this moment? The questions are endless, and the answers are constantly becoming more varied, with new equipment and technology arriving on a daily basis allowing for greater creativity, expression, and efficiency. When asking some of the preliminary questions in pre-production, it’s easy to get lost in a maze of options and combinations of options.

I have heard DPs with storied careers say no matter how much I learn, I’m just getting started. For people early in their careers, hearing that can be intimidating. It can also be exciting. There is so much to learn in the technical and artistic craft of cinematography, and it is continuously evolving. If anything, the one limitation we face is near-unlimited options, which can be the enemy of creativity.

With this lighting series, I am going to try to provide a guide to the labyrinth of lighting equipment and their uses. Narrowing down lighting units to specific choices for different applications. This is research I’m doing for myself, and I hope it will be useful to both beginners and seasoned cinematographers. After covering the basic types of lighting, I will start focusing on techniques and scene breakdowns later on. The next few blogs will cover the four types of light that dominate the industry: tungsten, LED, HMI, and fluorescent.

One of the most important choices a DP has to make when planning a production is what lighting to use. Arguably, this is as important if not more fundamental to cinematography than camera and lens choice. In many ways, it’s not about what camera you shoot with, rather how you use it and what takes place in front of the camera in the scene. Having technical and artistic understanding of lighting will have a much greater impact on the overall quality of a film than upgrading to the most expensive camera and glass the budget will allow for.

Learning types of light, what different lights achieve, and lighting technique is essential to cinematography. This lighting series will begin with summaries of different types of light, their strengths, pros and cons. Beginning with two of the most common types of light, tungsten and LED.

TUNGSTEN

The tungsten light is a staple of the film industry, and has been for more than 90 years. The light is a simple combination of parts: an incandescent lamp and a reflector, and in the case of fresnel fixtures, a fresnel lens.

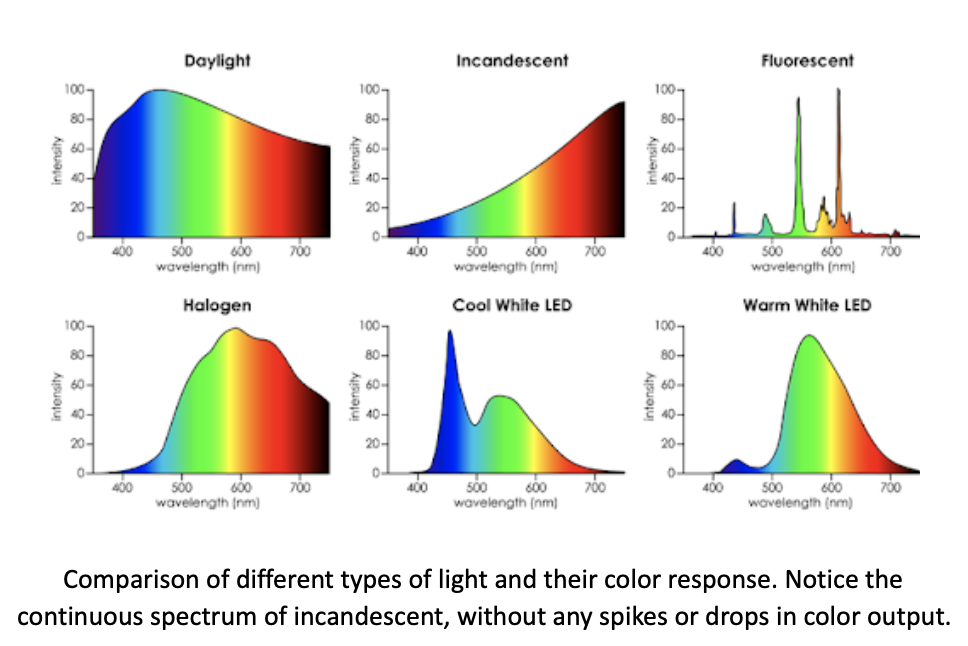
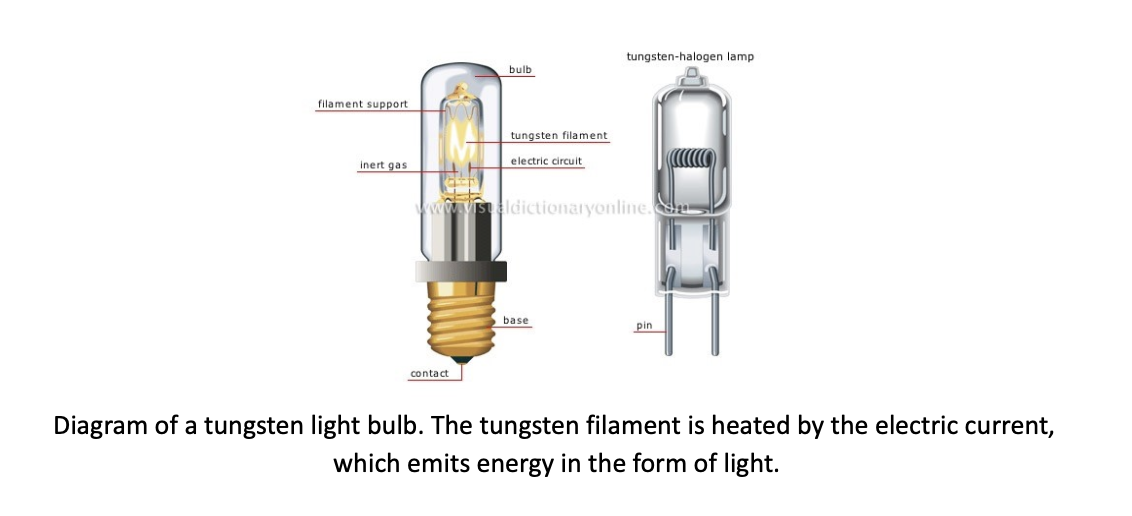
“Incandescent” means emitting light as a result of being heated. Developed throughout the 19th century and commercialized by Thomas Edison, the incandescent bulb produces light by sending an electric current through a tungsten wire (filament) and heating it to the point it glows. The light quality is heavily weighted in the red part of the visible spectrum with a balance of around 3200K color temperature. The color output response of heated tungsten is very even and continuous, which has led many cinematographers to prefer tungsten light over other sources. It is the purest form of artificial light and makes skin tones look beautiful.

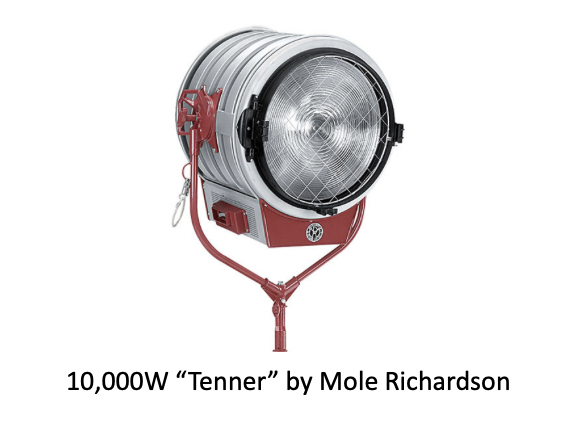
Mole-Richardson is the world-renowned leader in tungsten lamps. They make lights ranging from the 150W tungsten “inkie” to the 20,000W solarspot for a variety of situations. View their catalogue on their website. These lights are focusable, from “spot” to “flood” settings allowing for control of the beam.

Pros:

– Beautiful, continuous color spectrum, great skin tones

– Easily dimmable, flicker-free

– Huge range of fixtures that work perfectly together

– Controllable from spot to flood settings

– Affordable

Cons:

– Energy requirements – not much bang for your buck in terms of input and output

– Gets very hot, require gloves at all times

– 3200K color temperature, loses 1-2 stops of light to gel color to daylight balance

– Delicate and heavy

– Can’t be battery powered

– Cumbersome in comparison to LED, fluorescent

Tungsten lights have a wide range of uses, especially in controlled studio settings. Their greatest limitation is their power requirements in relation to their output, where 90% of the energy input is lost to heat. Especially on indie productions, tungsten lights are difficult because anything above a 2,000W light cannot be plugged into house power. By far the best thing about tungsten is the beautiful light that can’t be beaten by anything except daylight.

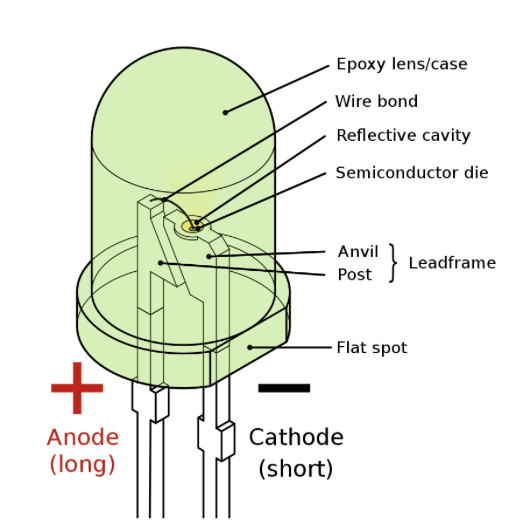
LED stands for light emitting diode. LEDs work through electroluminescence, which is the process of a material emitting light in response to the passage of an electric current. The diode is a semiconductor consisting of an electrically positive and negative side (“semiconductor die” in the diagram below). When a current flows through the diode, electrons on the negative side recombine with “holes” (atoms missing electrons) on the positive side in the p-n junction. When this recombination occurs, the electrons drop an energy level and in the process and release energy. The LED is composed of specific substances which allow this energy to be output in the form of light, and the specific amount of energy released dictates the light’s wavelength.

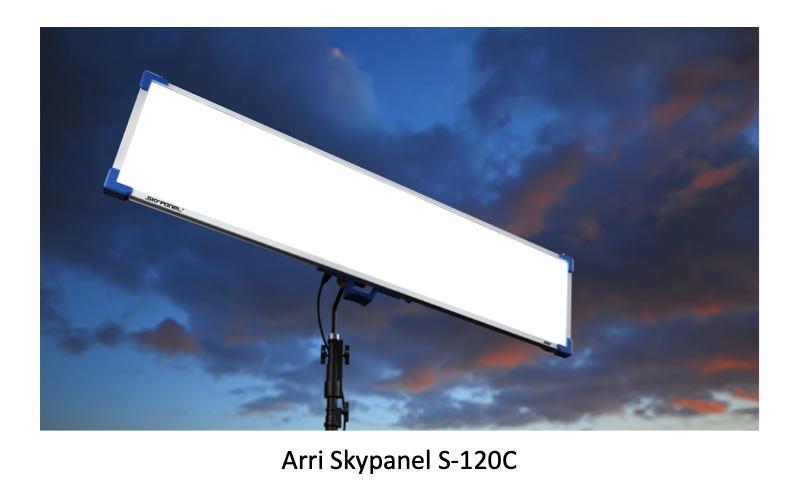
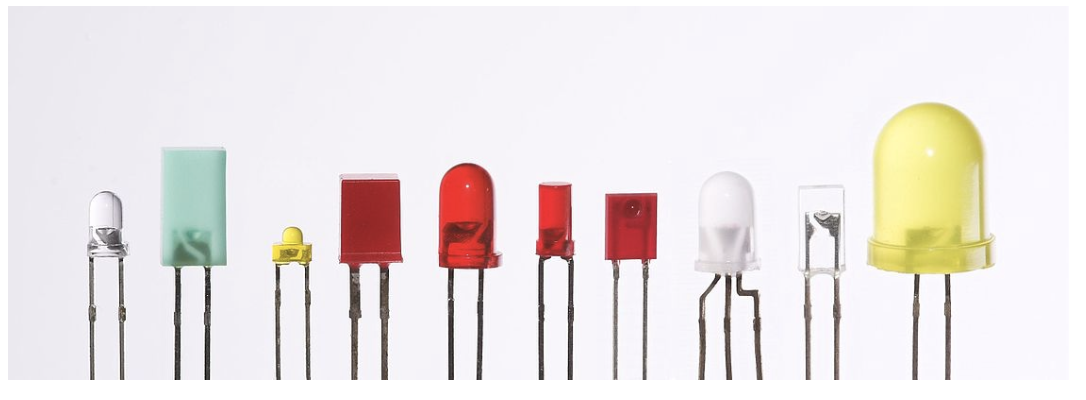
A single LED is very small, about half the size of a pencil eraser. A LED fixture has hundreds to thousands of LED units. Usually, LEDs are arranged in a panel structure, such as the Arri Skypanel shown above. This creates a naturally soft light that is very pleasant.

Most LED fixtures can change color temperature between 3200K and 5600K and some are RGB, which is extremely useful to have on set. In RGB LEDs, three LED emitters producing red, green and blue light are combined within one case and can produce a huge range of color.

LEDs come in a variety of shapes and sizes. They are very versatile lights. The most common type of LED is the panel arrangement, but LEDs can also be used in a fresnel light fixture to form a directional light that can be treated as a traditional lamp.

LEDs are extremely efficient – a 1600W LED puts out the same amount of light as a 10,000W tungsten (!!!). Unfortunately, they are also very expensive in comparison, especially for the highest quality units.

PROS:

– Does not use much energy, small LED units can run off battery power for hours

– Does not get hot, can be easily handled without need for gloves

– Easily dimmable

– RGB LEDs have a huge range of colors, most can change white color temp

– Robust, not near as delicate as a tungsten lamp or HMI

– Versatile, ease of use, great for run-and-gun and fast setup time

CONS:

– Color spectrum can lean towards green in cheaper units

– Light tends to look more “artificial” than traditional tungsten units, but this is getting much better with advances in color rendition

– Mixing LEDs from different companies can cause noticeable color issues

– Expensive!